Cake "Alice"
This is my “signature” cake – it tastes great but does not require a lot of time and effort.
Ingredients:
5 eggs
1 cup granulated sugar
1 cup raisins and/or prunes (I usually use a mixture)
1 cup finely chopped nuts (I usually use pecans)
1 cup all-purpose flour
½ cup honey
1 tsp baking soda
16 oz heavy whipping cream
8 oz Daisy Regular Sour Cream
1 cup powdered sugar
- In a large mixing bowl, beat eggs with granulated sugar on low or simply use a fork.
- Add raisins and/or prunes, finely chopped nuts, honey, flour, and baking soda.
- Mix well – but do not beat.
- Cover and refrigerate for 6 hours.
- Preheat oven to 400 F.
- Spray large round pan (approximately 11” in diameter) with cooking spray.
- Mix batter again.
- Pour 1/3 of batter into the pan and move from side to side for even coverage.
- Bake until dark golden brown and testing reveals (old-fashioned poking with a stick) that it’s done.
- If you have another pan, set this pan aside and repeat steps 8-9.
- If you do not have another pan, carefully slide spatula under the cake from all sides until it’s no longer stuck, place an empty plate over the pan, and invert the pan; your cake should land on the plate. If this process results in cracks, don’t worry – you will be able to cover your “crime” with filling.
- Now repeat steps 8-9.
- Cool individual layers separately – they are very sticky!!!
- You will end up with three cakes – three layers.
- While cakes are cooling, prepare filling:
a. Beat heavy whipping cream and powdered sugar until very thick and there are stiff ridges. I recommend using a glass bowl.
b. Mix in sour cream – you can beat the mixture but on low! - Spoon some filling on the bottom of large cake platter.
- Place first cake-layer on top of filling.
- Smooth about 1/3 of filling over the bottom layer – take care of sides, too.
- Place second cake layer on top.
- Smooth about 1/3 of filling over this layer.
- Place third cake layer on top.
- Smooth remaining filling over the top layer. Also, smooth sides so they look reasonably nice.
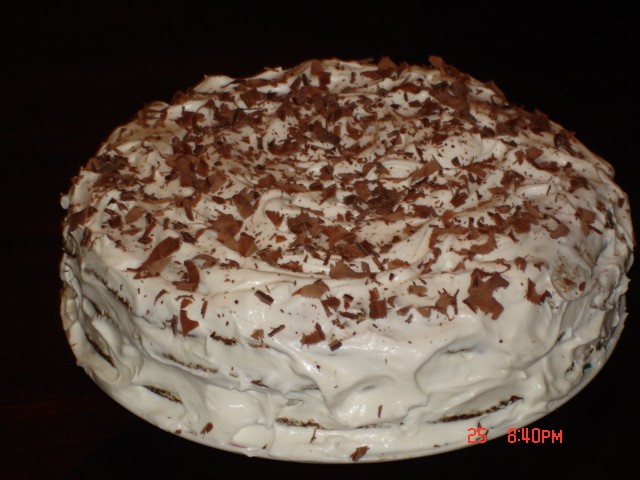
- Decorate with shaved chocolate.
- Refrigerate for about 24 hours.
posted by Alice @ 3:22 PM
![]()


2 Comments:
But looks lovely! Might try it this week!
This cake not only looks amazing, it is also very unique. The whole process is different, and I must try it very soon
Post a Comment
<< Home